
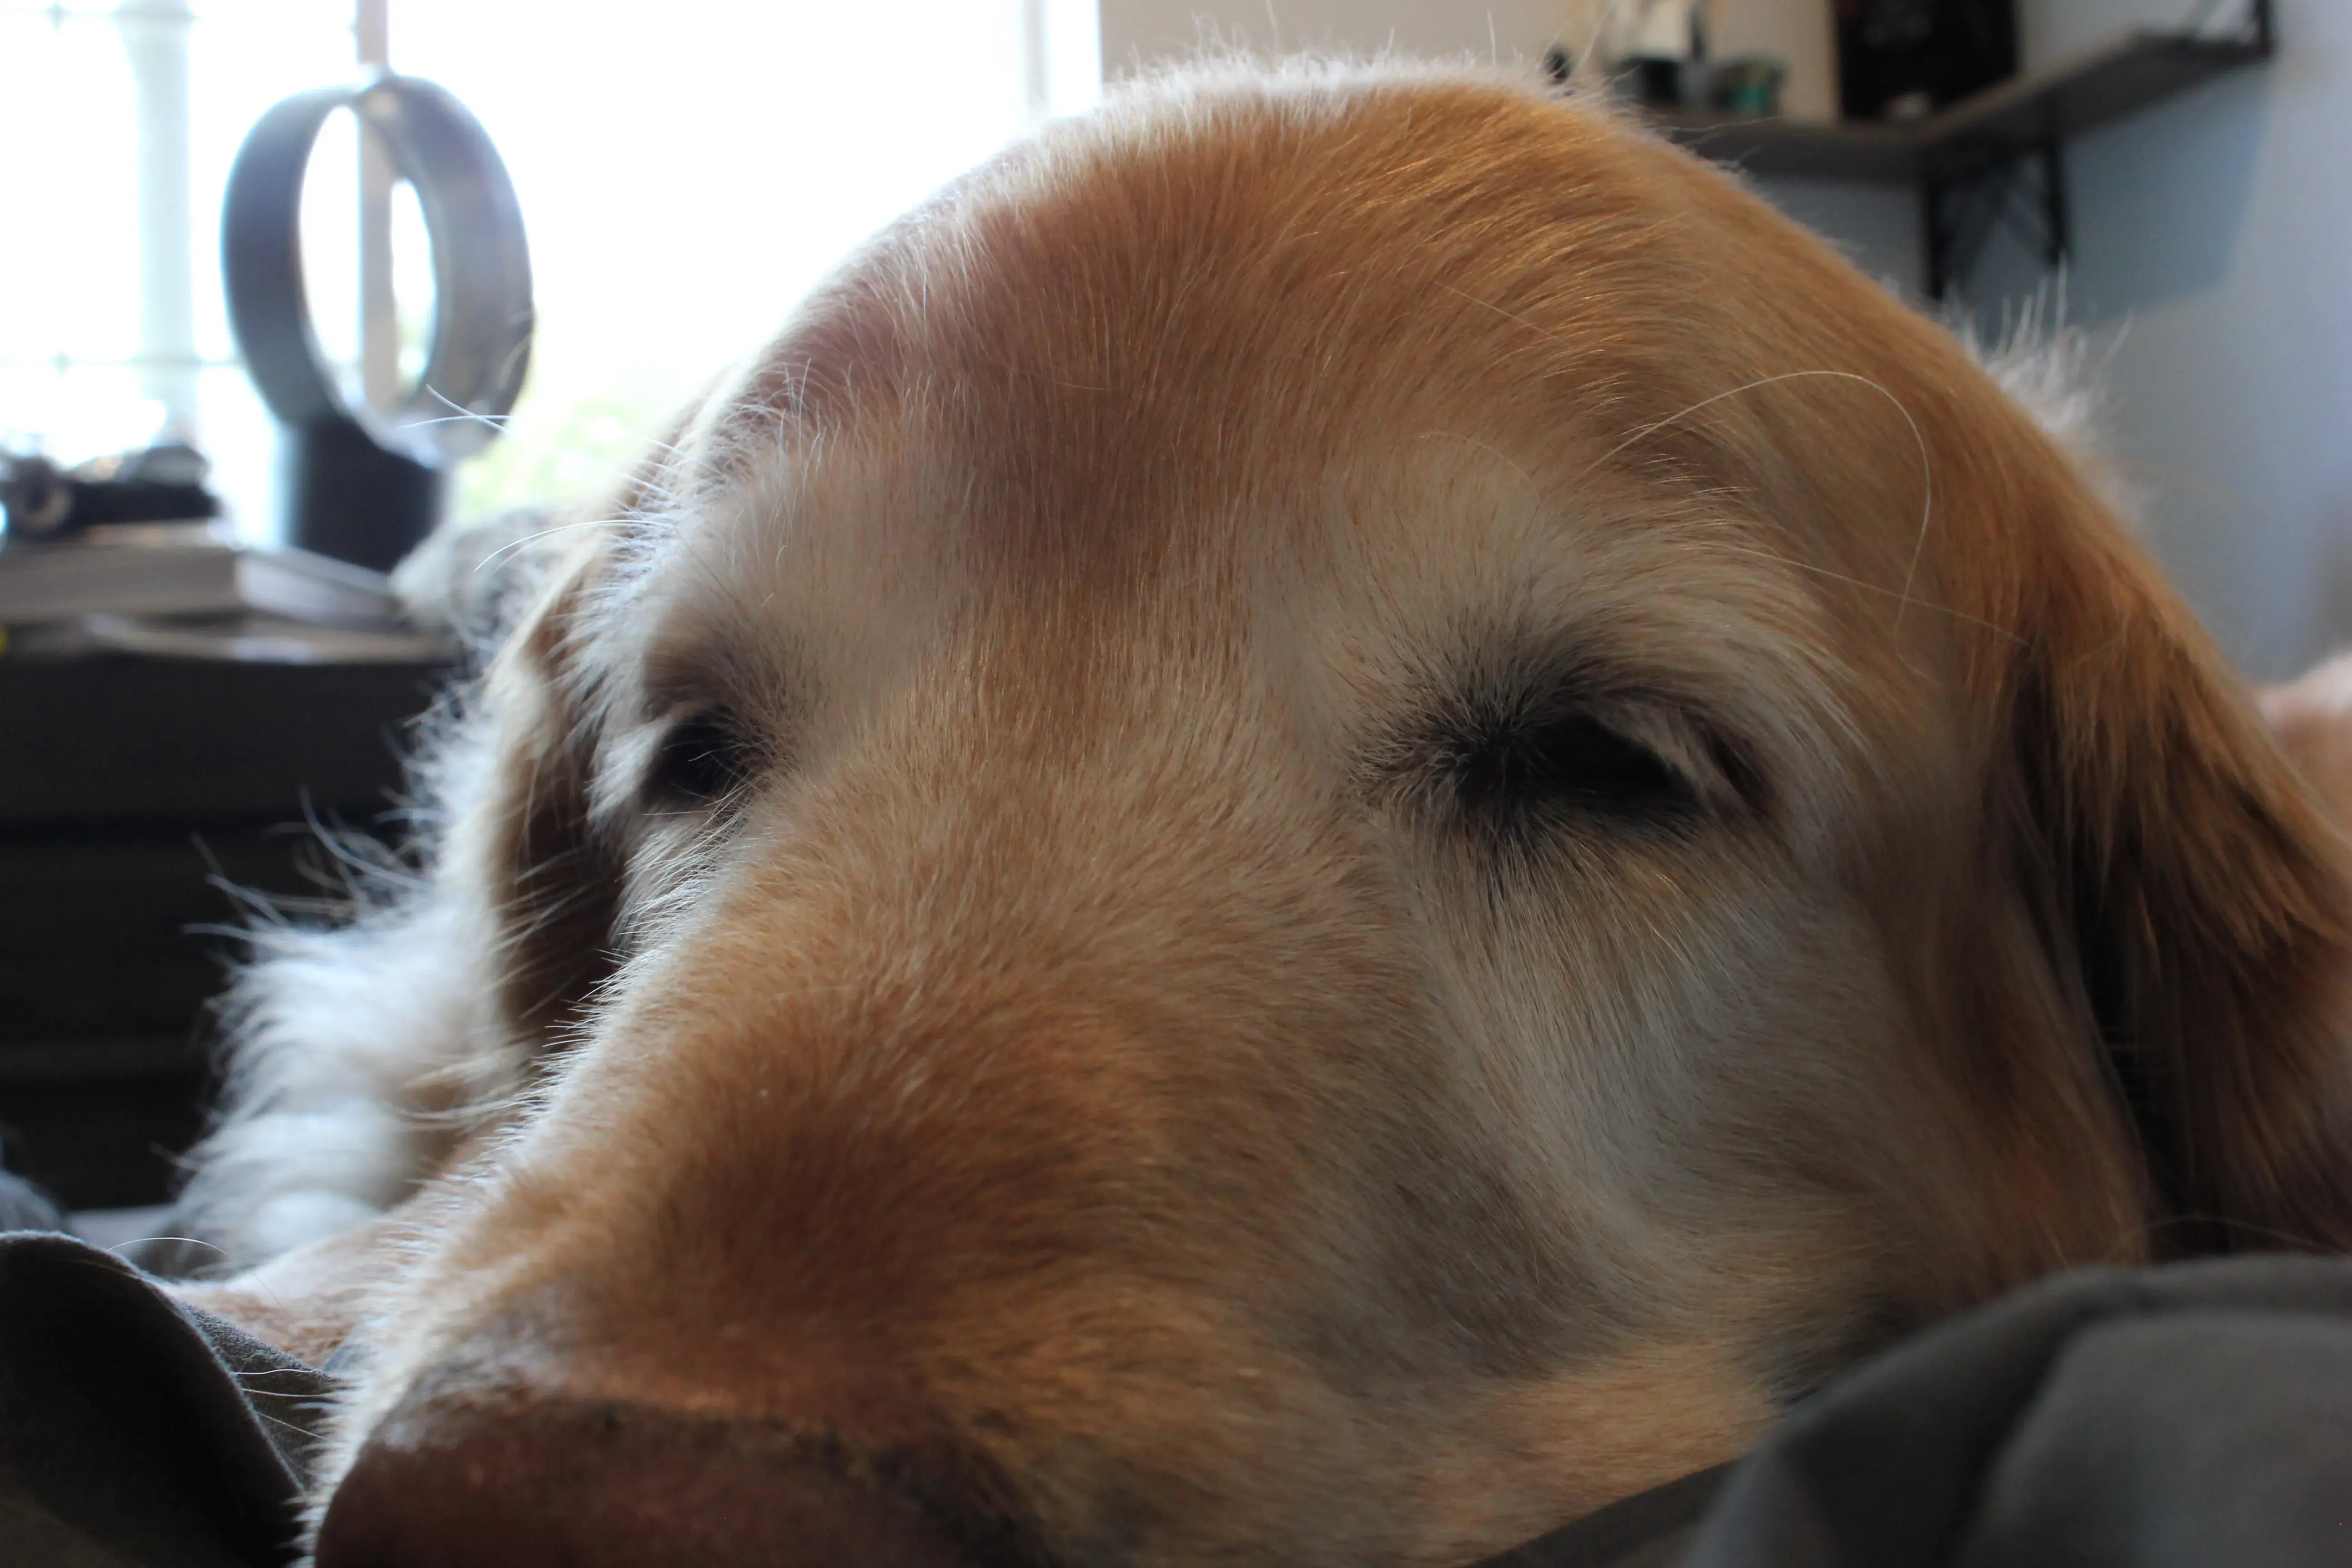
Starting off with the puppo! Her name is Stellar, and she’s adorable (I might be biased)
Exposure Settings:
Aperture: f/13 Shutter Speed: 1/13s ISO: 800 Focal Length: 28mm
Challenge Information:
I have to post one picture every day, I can take pictures in advance, in case I’m unable to take a picture for whatever reason (vacation, weather, idk) but I still have to post once per day.
I can’t post pictures of the same thing within like, a week or two, idk, I might get rid of this “rule” if I feel like it.
Don’t be afraid to give me any feedback on any of my pictures, I’m still veeery new to photography and would love any feedback given.
I’ll do my best to only share pictures taken with my Canon EOS Rebel T2i (or better if I ever get a new camera) but some days may be pictures from my phone, (I’ll let you know if that happens)
All images shared are originally taken as jpegs (5184x3456) without compression, but I always compress to 80% and convert to webp to reduce stress on Lemmy servers and make things load better. If you want a full-quality image, just ask me in the replies or dms, I’ll happily send it when I get a chance.
Also you’re free to do anything you want with any of my pictures, just don’t claim you were the one to take it :)
You must log in or register to comment.
A good start to your plan in terms of subject :)
Trivial critique time:
- Perhaps play with the “Shadow” settings of any luminance histogram tool you have to get a little definition (pupil vs. retina) in Stellar’s left eye - e.g. to match the definition of her right (will work best on RAW mode photos).
- Given the distance you’re taking this at, it’s unsurprising Stellar’s right eye, etc. is drifting out of focus due to “Depth of Field” issues, but you could try going to a much higher aperture for more depth of field (e.g. perhaps you are at around F4 try seeing what happens at F20 - though you may run into lighting/ISO issues.
I believe this was taken at f/13 or f/7.4 (difference between F number and Aperture value?) with 1/13 s shutter speed and iso 800, so I definitely had some room to mess with the lighting. I’ll have to keep that in mind for the future!
I should have been more careful with my jargon, on rereading my comment.
And I’d guess you are seeing two F numbers because of something to do with a “crop” APS-C sensor, so there’s the whole “Actual F number” vs. “Effective F number if had a full sensor”.
And do try RAW shots - I’m guessing you have access to Canon’s Digital Photo Professional for free, and that will allow playing with the RAW format image (lots more info in those) and saving to JPG.
But anyway, higher F numbers soften the sharpness of the “best” parts of the photo, in exchange for “OK” focus over a greater depth, and loss of brightness. You may well try the experiment and decide you’ve gained nothing by it, but experiments are a good way to learn. I have to admit to usually forgetting to consider if I should change the aperture in my shots (with the excuse that I take wild bird photos, so loss of light is usually really bad news).
something to do with a “crop” APS-C sensor, so there’s the whole “Actual F number” vs. “Effective F number if had a full sensor”
Interesting, I’m guessing the real aperture is F/7.4, since that would make more sense with the depth of field.
I’m guessing you have access to Canon’s Digital Photo Professional for free
Unfortunately not, I’m using Linux, and it looks like DPP only supports Windows and MacOS, do you know any similar apps I could use?
But anyway, higher F numbers soften the sharpness of the “best” parts of the photo, in exchange for “OK” focus over a greater depth, and loss of brightness.
Yeahhh, I do know the basics of photography, I took two digital photography classes when I was in high school, but that was a little while ago now. From my current understanding, aperture corresponds to the diameter of the shutters as you take a picture, with a lower aperture, more light is gathered from all focus levels, so only the light around the target is discernable. Shutter speed is simply how long the shutter stays open to gather light. ISO is how sensitive the sensor is.
Edit: Whoaaaa just tried taking pictures as RAW+jpeg (it takes both at the same time) so I could compare side by side and wow RAW looks incredible
On RAW format - it is an interesting format, if you’ve got something that can process it. Very very very loosely, it contains the photon counts, rather than a JPEG which puts the counts into a set of 256 buckets and tells you the bucket numbers. As such, changing things can be done with much more precision. It also has a far better chance of recovery from overblown or underexposed photos. You also get the picture before computed sharpening and mosaic removal. That said, you must be using something to understand Canon’ RAW format! You might want to check it for additional facilities! In passing, the information in RAW format transfers pretty closely to TIFF format. And finally, RAW format files are huge - be warned!
On the F number - yes, though I’m a little surprised you can’t choose to have a smaller aperture, depending on the lens you have. A kit lens for that camera is EF-S 18-55mm f/3.5-5.6, but perhaps you have something different.
Alas, DPP4 serves my purposes so well for all the processing I want to do, and also being on Windows 11, I’ve not looked at alternatives.
If you can bear to look in Reddit: https://www.reddit.com/r/photography/wiki/postprocessing/#wiki_which_raw_.2F_post_processing_software_should_i_get.3F
On Aperture - sorry for going over old ground for you.
Interestinnggggg, RAW files seem like they’re 4-6 times as large as the jpegs I was taking before, so not awful, but definitely big!
I’m not sure what made you think I can’t change my aperture smaller, I absolutely can! That lens kit looks just like the one I’m using, though I also have another one that’s EF-S 55-250mm f/4-5.6.
And no worries, it’s not like you had any idea what my background is.
Sweet photo! I’ll give some feedback:
keeping in mind that there are no hard-and-fast rules in photography… they’re meant to be broken (sometimes). But, I usually try to avoid backlit subjects. It’s not a bad effect in this case, especially with how the fur on the left gets lit up… that looks nice to me. But then you have the problem that the background is way brighter than your subject, and the viewer’s eye tends to go to the brightest part first. And you could post-process doggy’s face to be brighter, but there’s only so far you can post-process lighting stuff like that before it starts to look a little fake.
I agree with others about always shooting in raw. I just switched to Linux so I’m in your boat–but if I can’t get Affinity working in Wine, I’m going to use something like Darktable to process my RAW files, then import into GIMP for further processing. (I do hope I can get Affinity working though… it’s not supported in linux but I think some people have had luck. GIMP will do, but, meh.)
Side note, I like shooting in aperture priority mode. That way I can plan from the get-go: what do I want to be in focus here? If I want just the subject in focus, and everything else blurry, I’ll open it way up to f/2.8 (or however wide my lens goes). If I want the background in focus, I’ll go to f/8 or f/11 (keeping in mind what Kevin said, you start losing a little sharpness if you go much smaller than 11… but, you won’t notice unless you’re printing big, most likely). Also like Kevin said, if you have a shallow DOF (wide aperture like 2.8), likely you’ll only be able to get part of your subject in focus. Heck, even at f/8 when your subject is this close you won’t get it all in focus (as you can see from doggo’s nose vs eyes). So, it’s a tradeoff. part of the fun of deciding in the moment. :)
For me, post processing is half the job. Or more! Taking the pic with your camera, your main job is to focus, get your composition basically right, and get your lighting basically right. Some of that stuff you can fix in post, but if it’s all good, you can really use post to make something magical.
Anyway, looking forward to more pics!
I was just looking stuff up as well and found darktable, which seems to work well, but I feel like I’m doing something wrong, what exactly should I be using darktable for? I’ll have to explore GIMP and Affinity, as I don’t have any experience with them.
Thanks for all the feedback! It is greatly appreciated.
My pleasure!
So yeah, the idea is, once you have a jpeg, you can only make small changes before you start getting artifacts (banding, etc.). So you want to do the big changes to your raw file (in darktable/rawTherapee/AdobeCameraRaw/etc), such as white balance adjustment, bringing up your too-dark shadows to bring some details back in, bringing down your blown-out highlights to bring any details back in, etc. It’s amazing how much info is stored in a raw file, and you can really tweak those shadows/highlights sliders without bad artifacts. Once that’s done, you export a jpg that you will then edit in photoshop/affinity/gimp, to do the less heavy-handed, but more artistic and more fun stuff like adding a little contrast here and there, adding a vignette, some painter-ly dodging and burning to make your subject look cool or to add drama to your clouds or buildings, color adjustments, cropping, etc…fixing flaws like a loose hair or a rock or a random person…
Everyone has their own workflow, and I got mine from watching a bunch of videos and sorta settling on something. it’s a fun journey! But totally ok to start small, just have one little goal like “I’m gonna add some contrast.” then you’ll be like “oh maybe I’ll make this eye a little shinier.” then you’ll watch a youtube video about how to do one trick and then you’ll be like “I’m gonna do that on every photo!!” hehe. It’s very open ended and there’s lots of fun to be had. I’m no expert by any means! but happy to answer questions.