
Hi everyone, just to put some content in this community, I thought that sharing my setup could be useful to some people!
I have a Creality Ender 3-S1 Plus as my first printer. Why this choice? because… I wanted a big set, it suited my budget, and… I didn’t know too much about it so I followed my instinct.
First thing I did was to replace the original firmware with this one. Many more features including a lot of work on the touch screen, and more compatibility with Octoprint (see below).
I then installed a led strip with a support printed by me.
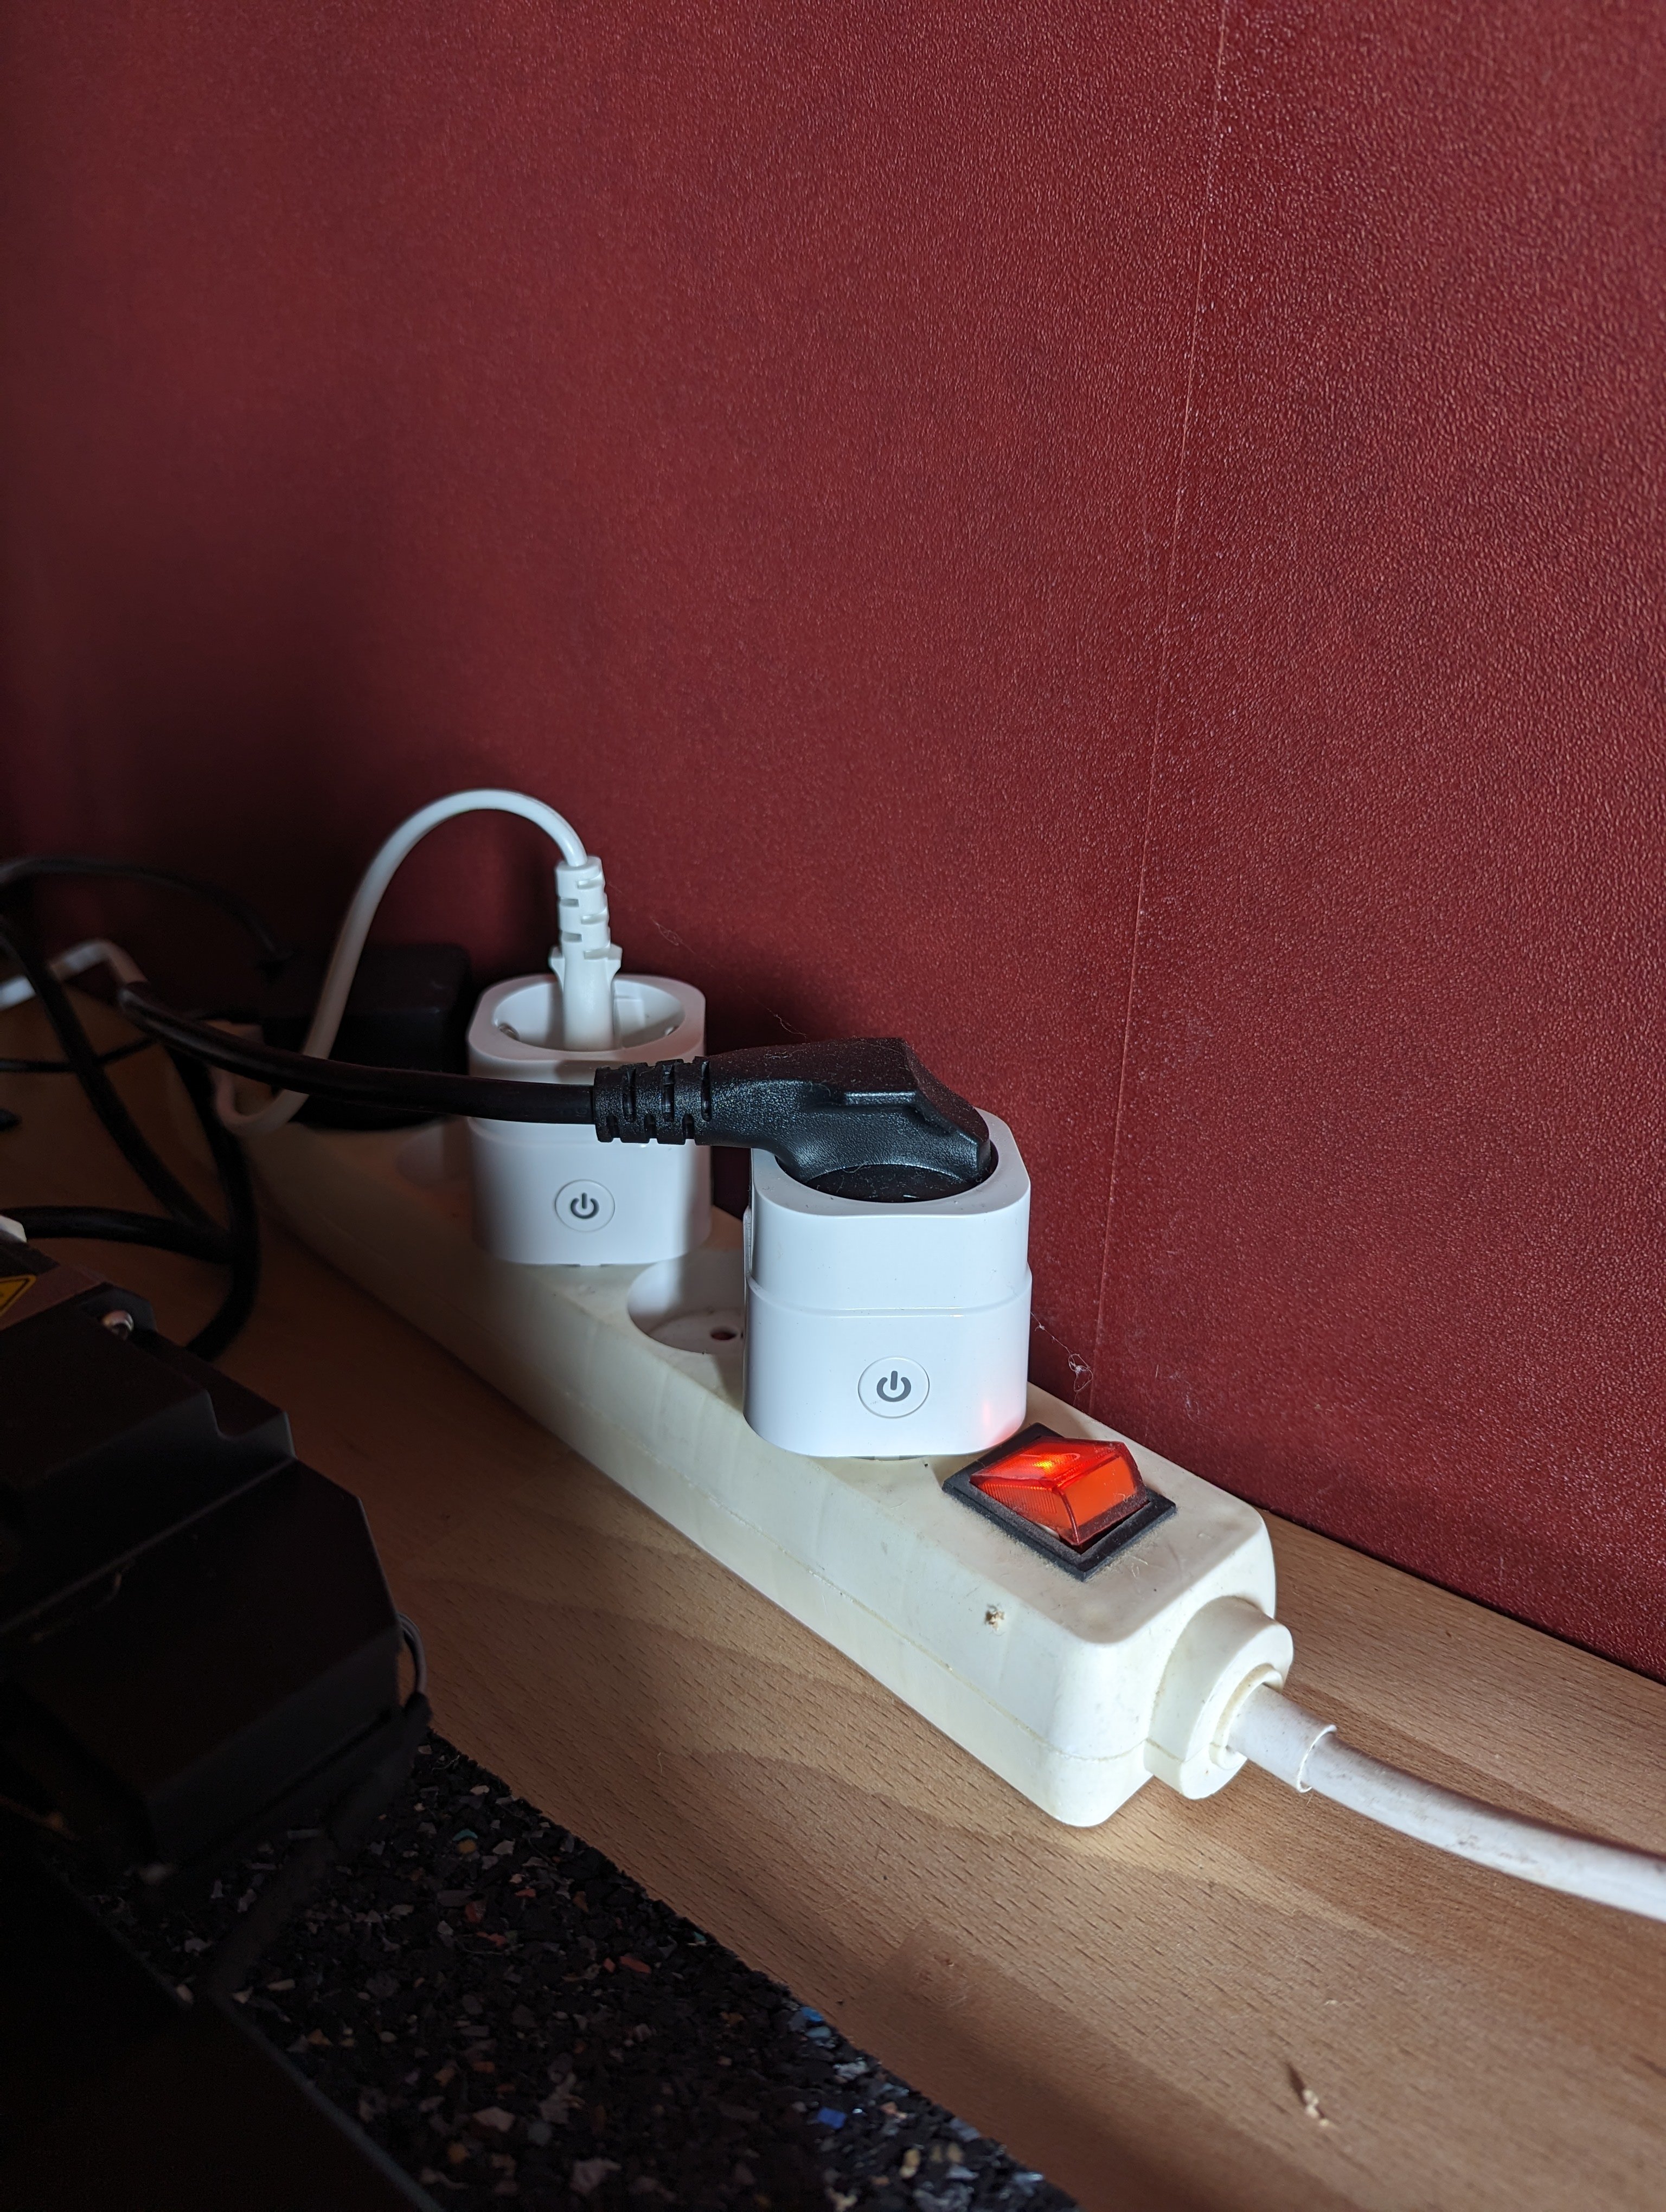
Then Tasmota connected sockets (open source firmware).
Driven by Octoprint, I can turn on my printer remotely, then the LED strip and the printers will be turned off automatically at the end of printing.
Open-source was important to me, for control to be done locally only, and not via a server on the other side of the world…
I then discovered via Reddit (urg) the existence of Octoprint.
After trying to install it on my first generation RPi, I bought an RPi 4 and created myself an optimized server.

I added some plugins including:
- Bed visualizer: to have a 3D visual of the bedleveling
- OctoEverywhere! (in free version) to have access to my server outside my local network (at work for example)
- Signal Notifier: to send me a message on Signal (I hate Meta and therefore Whatsapp) when the print is finished
- Tasmota: to control my connected sockets, very easy to use by adding commands in my Gcode
- UI Customizer: to have a beautiful interface
- Slicer Thumbnails: to have a preview of the Gcode rather than just the name (requires manipulation in Cura)
- M73 progress: to display the printing progress on the touch screen

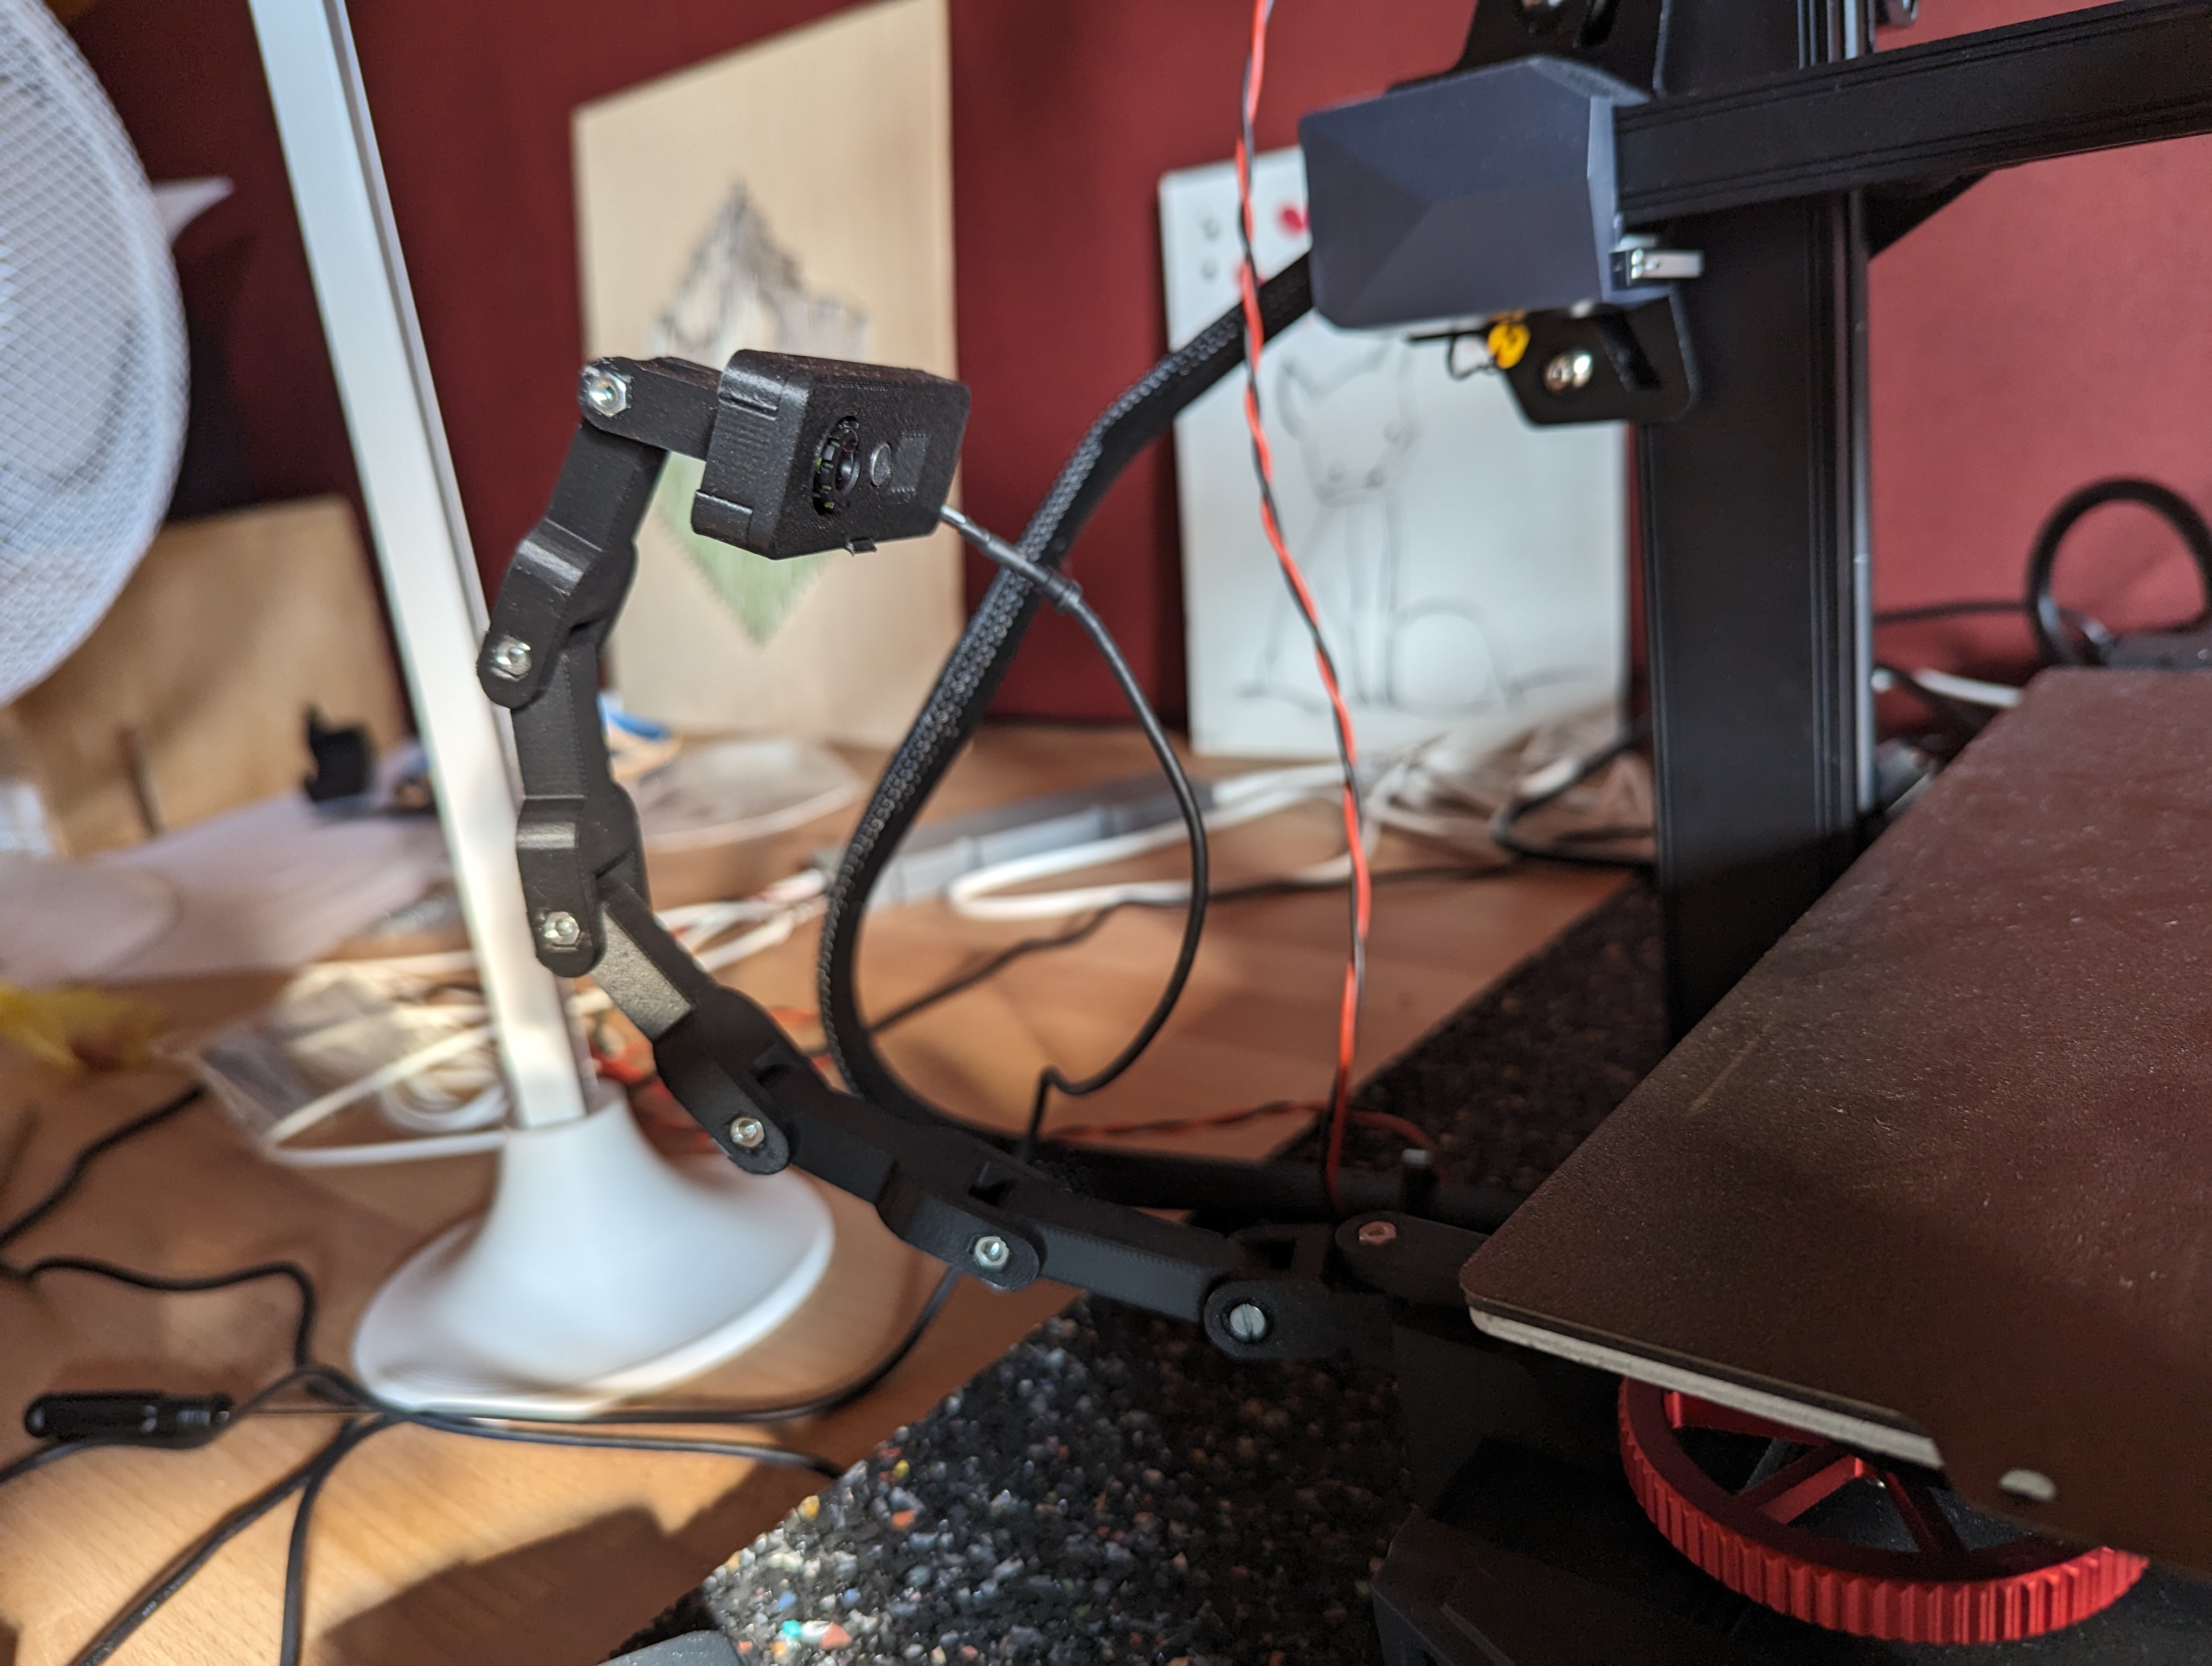
To perfect my installation and avoid going back and forth to check my impressions, I installed a Logitech HD C270 with a custom case.
Here, to conclude, I had a lot of trouble with Signal to install it on the RPi but I created a script to achieve this easily. And I burned my first bed by putting a Z-offset too low so I bought another one on amazon which I am very satisfied with.
My next project will be to confine my printer to print ABS.
Edit : (Yes, I need to clean the bed)
Edit 2 : Here’s the video to not burn your bed, watch it until the end!
I really advise you to change the firmware (printer AND screen) by the one I propose.
It allows you to see your bed-leveling in 3D and realize how good it is or not. Then you have to make it as smooth as possible, but 100% smooth is not possible.
To do your bed-leveling, I advise you to heat up your bed and your extruder. For my part, I heat them to 60°C and 210°C respectively. This allows leveling by taking into account the expansion of the materials.
Anyway, I’m also having more trouble printing properly on the outside of the bed
So turns out I was using a slicer configured for the ender 5 plus thinking that it would be closest to the 5 s1, but the bed sizes are drastically different. Running a reprint now with the prusa-slicer to see if it goes better.
I’m reluctant to mess with firmware yet, but if the firmware you picked also works with my printer, you’ve got some demonstrated expertise :).
I assume I need to remove the filament to level, but I’ve never done that before.
If needed I can help you but only on Cura.
Do you have a Creality Ender 3-S1 Plus too?
No just the 5 s1.
And now I totally wrecked the bed by badly adjusting the nozzle… So no more printing today. Lowered bed to clean it and moved the z axis offset by mistake :(((