I’ve played around with an arduino and breadboards a fair bit, but this is my first attempt at making something more permanent. First time using a soldering iron as well, so it took a long time to get everything connected properly. Any constructive criticism is appreciated!
With connections like these who needs resistors?.
With enough current those leads will re-solder themselves.
It’s a built-in fuse. It’s not a bug. It’s a safety feature
e You’re fine, it’s practice.
Some of those wires are quite thick which will pull heat away fast making soldering with shitty equipment hard. A good soldering iron* set to the correct temperature will help massively. Flux gets you then last 20% of the way. Most solders are flux cored, but a little pot of rosin flux you either dip the end of a wire in or dab on (i use a sharpened chop stick because no static and cheap) and suddenly the solder flows like water.
Remember not to heat the solder and instead heat the joint. My favoured technique is to “tin” both sides individually and then put then against each other and a quick touch with the iron to make the joint. Ensures you have good contact and doesn’t require growing extra fingers although it is slower.
Hobbiest electronics don’t need perfection, some failure is fine you can always repair it since you made it.
Never be embarressed to learn a new skill!
- don’t worry about crazy expensive name brands tbh, there’s some pretty great stuff coming out of China quite affordably if you’re willing to trawl through reviews. Not the bottom dollar stuff but usually about ~30% cheaper than the Japanese brands or Weller
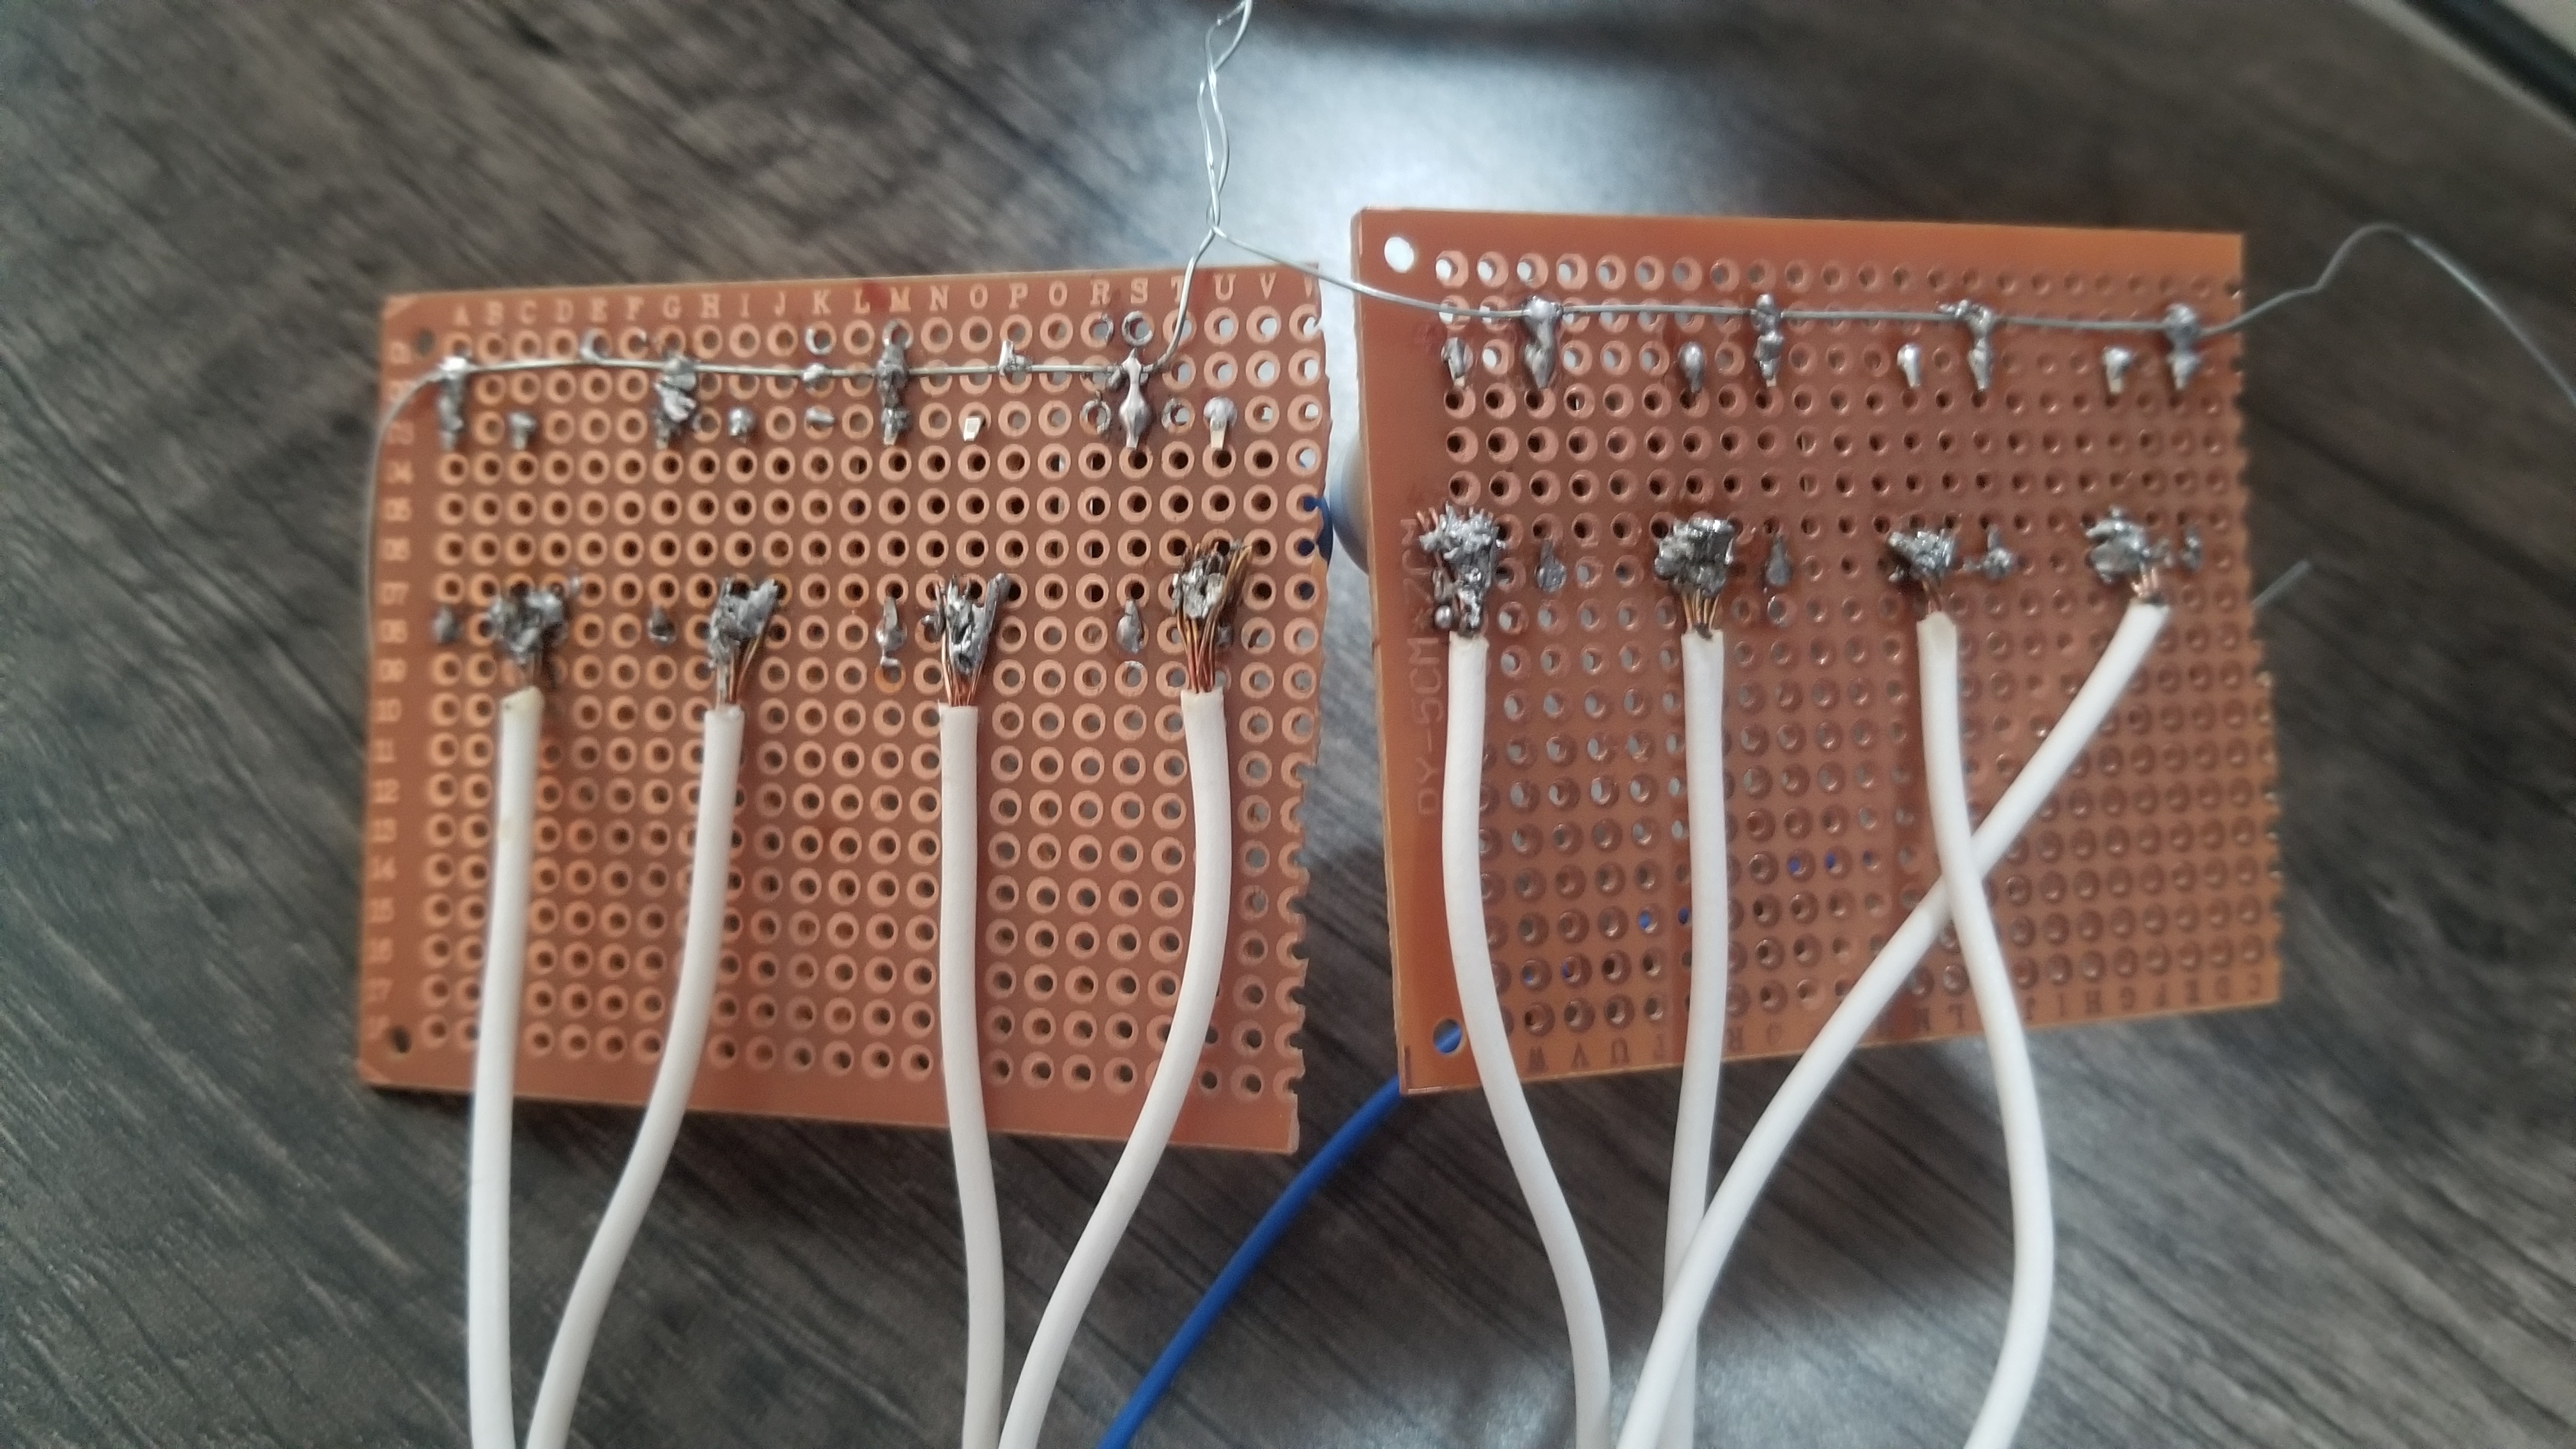
edit: here’s my impatient soldering of the last couple of days:

Some of the joints are garbage (had to rewire some, lost patience) but if you look at the joints in the foreground you can see how much neater tinning each side and joining can be.
Check if your solder contains flux. Often, you will want to apply additional flux manually anyway.
But, most importantly: it looks like you’re trying to touch the hot iron with your solder (or vice versa). Don’t do that. Use the iron to heat up the wire and then touch the solder to the wire and let it wick up once sufficiently hot. However, you will want to have a bit of melted solder on the tip of your iron to enhance heat conductivity.
As others have said, pre-tin your wires before connecting them to anything.
And yeah, so far, it’s a hot mess. But you’ll get there in no time. Watch a video for proper technique.
If you end up buying some flux then I’d recommend you also buy and try a block of violinist rosin:
https://www.ebay.com.au/itm/315948528490
You break it up and then dab chunks onto your joint whilst soldering. Some will melt off and then burn. From there it acts just like any flux: reduces the metal oxides, makes the solder suddenly flow (behave) a lot better and provides some level of temporary oxygen shielding with its off-gassing products.
Pros:
- Cheap
- Doesn’t smell awful
- Long working time (easy to use)
- Very simple ingredient (distilled pine tree sap) made by many manufacturers, so it will never go out of stock.
- Residues are non-conductive and can be safely left on your boards
- Residues are reasonably easy to clean (isopropyl & most board cleaners work; ethanol also works but tends to leave ugly white streaks)
Cons:
- Smoke is still harmful (smoke = incomplete combustion compounds)
- Residue is dark, unlike the transparent residue of many no-clean fluxes, so it can hamper inspectability for mass manufacture.
- Best handled with tweezers, otherwise your fingers end up feeling sticky (pine resin compounds are slightly sticky)
- Not Modern or youtube popular, so people will tell you that it’s therefore bad or worse than other products.
I use it often, it’s my favourite for both big joints and fixing smd work. Grab some and try it :) The worst you will be out of pocket is a few dollars.
I’ve had some issues with other flux products I’ve used because of their alcohol content boiling off & cooling my board whilst I’m trying to heat a region up to work on it. Solid rosin doesn’t have that problem, you can dab it on whilst the iron is still covering some SMD joints (eg QFP pins) on your board and it will work instantly.
Just tin your wire ends. Heat them up and wick solder onto them.
Hey! Props to you for trying something new. While the through hole components look OK, soldering large gauge wire can be quite tricky, especially if the soldering iron is not powerful. What soldering iron do you use? In these cases especially, it is important to wick the wire first, wick the soldering pad and finally assemble the two. Raising the iron temperature for this can also be useful (I sometimes use 400° or a bit higher). It is counter intuitive, but hotter iron means quicker soldering job, and less heat in the surrounding area (e.g cable’s insulator)
if we roast them, they will de-solder, which is s good thing, so you could try again
Another tip that doesn’t seem to have been covered, clean the pads you are soldering to. A quick buff with some steel wool to get them nice and shiny. If you’ve touched it with your hands, the oils from your hands can make it hard to solder to the pads.
Also, get a hot-glue gun and glue the leads down, especially if your going to manipulate the leads. The pads will happily lift off the board and you’ll be screwed.
Impressive you got a connection without melting the solder.
First of all, welcome to the collective of silicon wizards (a.k.a electronics engineers) your robe and hat are being dispatched as we speak.
Second, well done for attempting a new skill most are too afraid to even consider.
Third, all of the advice offered here about flux and tinning the wire ends is sound. So I’ll offer some other advice, check what temperature you set the soldering iron to. It might be too low. I prefer putting my temp at 350 degC. Others will argue for a slightly different temperature.
If your answer is “but I don’t know what temperature my soldering iron is at” then you ought to get one with a temperature control. I won’t recommend a particular brand or price point because you should only spend what you can afford on a hobby. But there’s plenty of articles and opinions (be careful about some of those being the same) about which brands are good quality at different price points.
Also, two additional things to think about getting:
-
A basic as fuck desktop extractor fan that has a carbon filter. This will be for the flux fumes.
-
Some form of overhead lighting and magnification. These can be separate but you can get magnifying lamps. This will help when you start venturing into the world of surface mount components.
Good luck and we’re looking forward to seeing your future creations 😊
-
You will get better results if you twist the cables and then saturate them with solder before soldering them onto the PCB. Even better might be to get some solder on the board too before soldering
My 103 year old grandma has better joints
Better than I can do, I don’t have the context to roast you.
right i came here to participate but i don’t have anything
Nope 😊
Although if you wanted to tin the wires a little better, I’ve found flux helps loads especially when using lead free solder. I used to struggle before trying it.
You did a good job separating the interior wires to increase their surface area with the solder. Splaying out the bristles allows the solder to penetrate the whole wire and enables a good connection. You didn’t make the Arecibo collapse mistake.
You have a lot of small chunks with poor interconnectivity. It’s like you dripped solder onto the wires and let each drip cool before the next one landed. Try remelting the solder into a contiguous pool and letting it reform the connection. Maybe even add more solder so there is enough to coat the available surface.
The only structure holding these wires in place is the solder. Try poking some of the wire bristles through the holes that you are trying to make a connection with. Aim for a closer connection between the wire and the breadboard, and structural integrity against impacts. Compared to your wires attached next to the conductive holes, a wire threaded through a hole that gets knocked around is more likely to end up in a new position that remains in contact with the hole.
Make a solid and strong connection using the structure of the the materials, then add solder to glue it into place. Look at how the clips on the components that you are attaching to use their shape and rigidity to keep pressure against the conductive holes. Make sure that the solder fully melts and makes a contiguous connection.
Came for the roasting. Left with a load of practical tips to improve my soldering.

