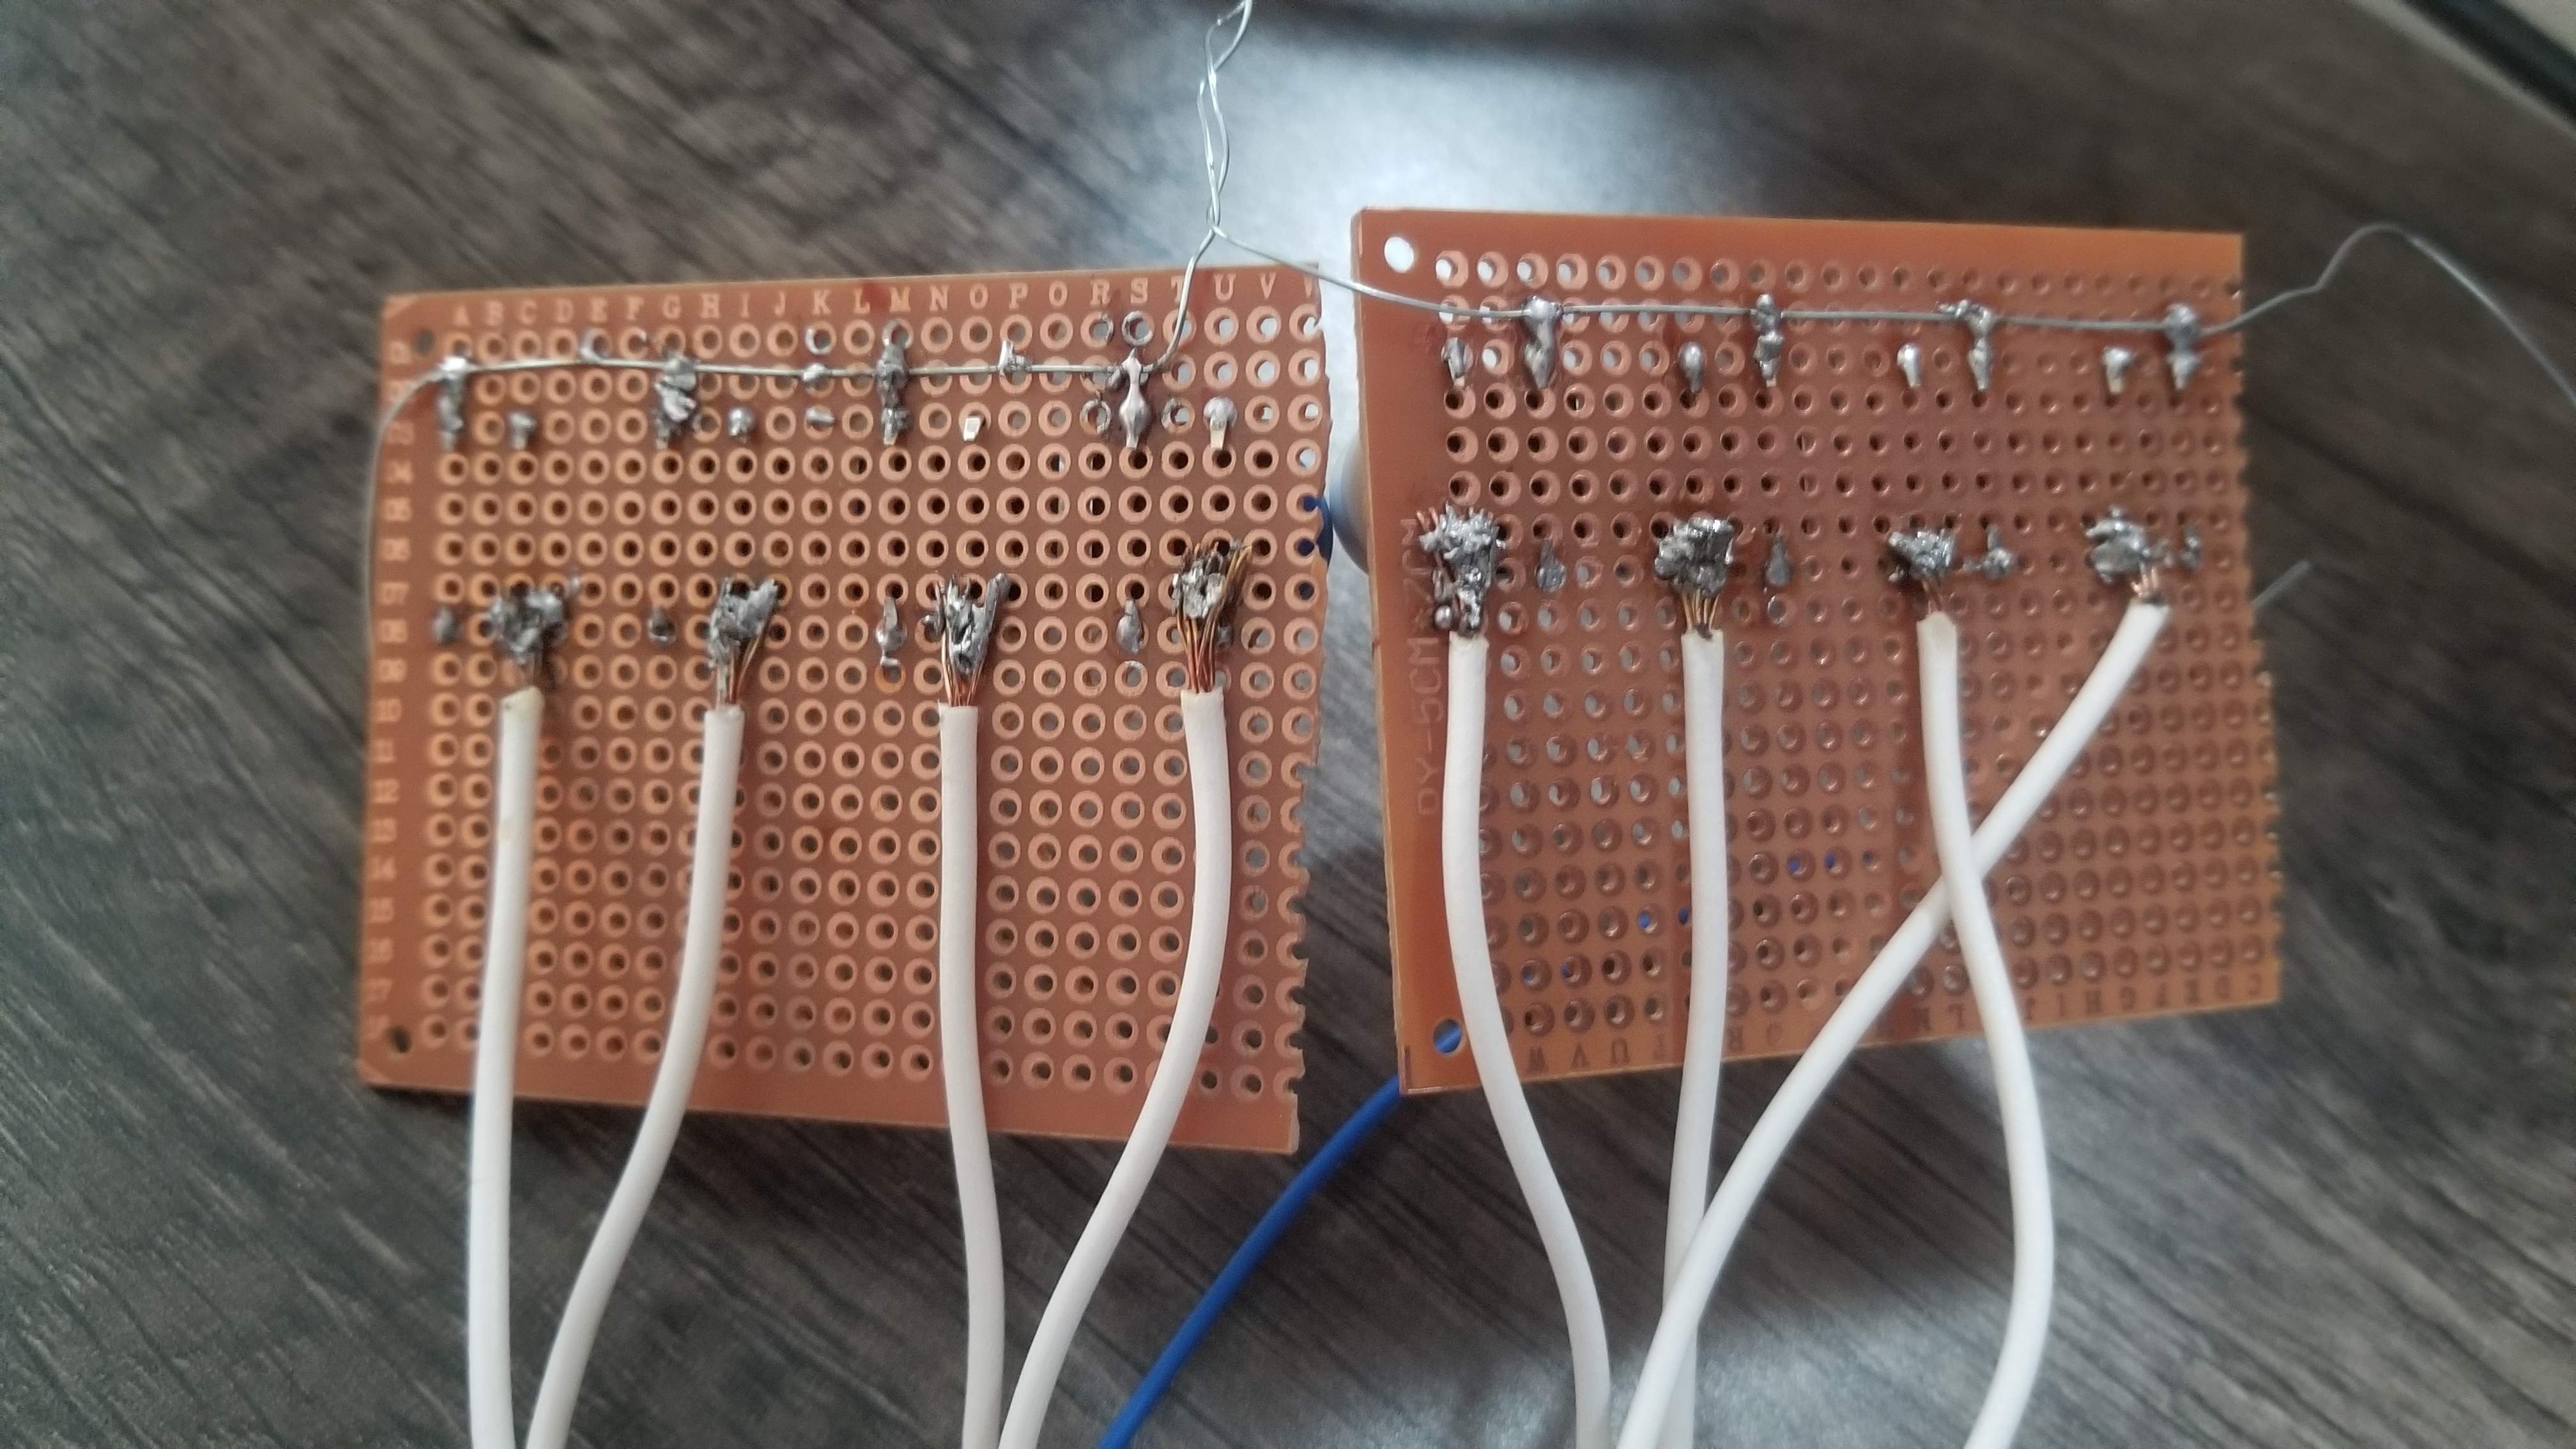
I’ve played around with an arduino and breadboards a fair bit, but this is my first attempt at making something more permanent. First time using a soldering iron as well, so it took a long time to get everything connected properly. Any constructive criticism is appreciated!

It looks like you’ve melted the solder with the iron and applied melted solder to cold wires, so it hasn’t actually attached to the wires at all.
Use your iron to heat up the wire. Solder won’t attach to cold things.
Also, twist the wire ends to keep the individual wires together and solder them before you actually try and connect them to something.
heat up the wire for a while before coming in with the solder, you will notice it will flow and “stick” much better. the soldering iron should be touching the components you want to solder, and you apply solder do that, not to the iron. its supposed to melt into the hot components, not be melted then dropped on them.
also, pre-tin stuff before applying them together whenever possible, meaning get the terminals twisted and pre-coated in solder with the aforementioned technique. you can find videos on youtube to get a clear picture. you will notice every joint you do will suddenly be much better.
They’re roasted enough
Yeah I was about to say, what more damage could I do, they’re already dead!
A couple tips from another amateur:
- Twist those wire ends before doing anything. You want a good spiral on them with all of the strands together.
- With the wires well twisted, tin them. This means hold the iron against the wire end to get it hot and let solder flow over the wire. The wire end should then look like it’s coated in solder. There are a lot of videos on it, search for “tinning wire”.
- Keep practicing, it gets easier.
Permanent? dont have that busbar flapping arund in the breeze, clip it down. Does that loopy bit have a purpose?
You just need more practice. Reheat some of those, let the iron linger, add more solder maybe flux too. until the solder flows and goes shiny.
The iron needs to dwell long enough to get both parts up to temperature so that the solder flows between both. This means that when heating a larger thermal mass, like the big wires, you need to dwell longer.
You’re heating the parts to be joined, not the solder. Add more flux.
Practice on different sized wires or parts attqached to large ground planes and so on til you get a feel for the thermal mass of the joints.
bigclivedotcom on youtube has some videos on soldering basics. https://www.youtube.com/watch?v=aIab66EgfHM
There is no such thing as too much flux in soldering.
There are a lot of other details wrong here, but start with getting some flux.
This works really well:
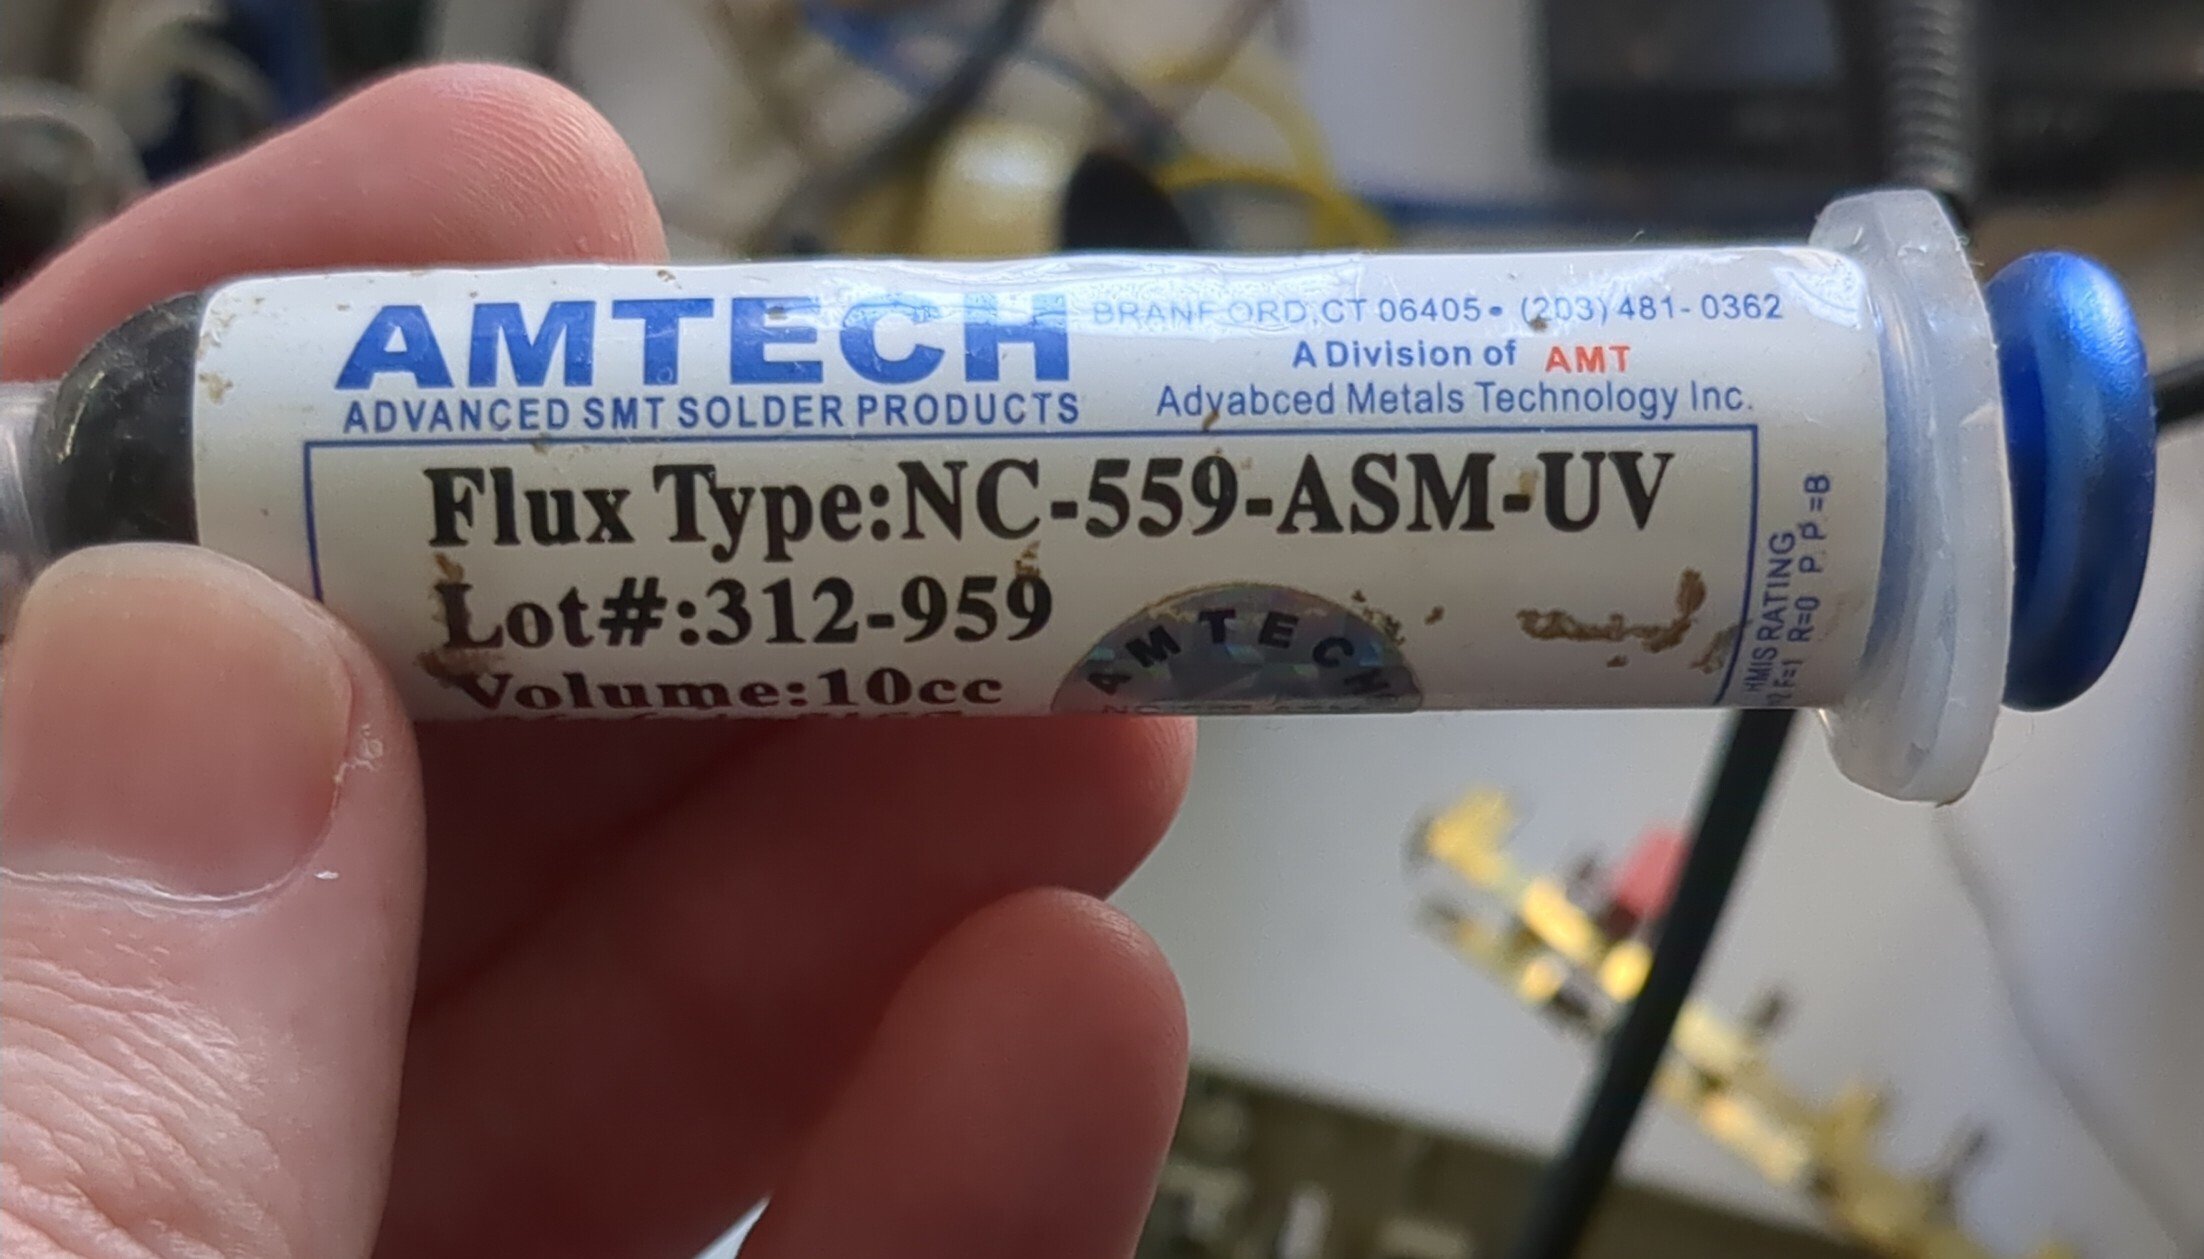
Use an old ultrasonic toothbrush with alcohol, or use a cheap jewelry ultrasonic cleaner and alcohol to clean off excess flux in 2 baths, dirty then clean(er).
My goto flux is knockoff Kingbo RMA-218 from China (the whiter stuff is much better than the yellow stuff, and is thankfully the more common variant).
Somewhere around, I have a tube of whatever brand random flux (not about to try to find it right now), but originally it was white, but has turned much more yellow and thicker over time. Still does the job though, but yeah it seems a little more difficult to clean off afterwards now.
TL;DR - Sometimes the color of the flux is more of an indicator of how old it is moreso than the type of flux.
This is worse than Stevie Wonder’s brief stint as an orthodontist.
Roasting aside, I’ve seen much worse, and in professional spaces. Do some practicing, try more or less heat, get some flux, and give yourself time to work.
Looks like not enough flux or heat.
You’re supposed to let it heat up first.
I won’t be discouraging because I support the handicapped participating in the electronics space.
Those aren’t well done solder joints, they are congratulations on soldering.
Did you hammer the solder on?
Your solder joints are so fat, they ask your mom for dieting tips.


